AEM Local Setup
1. Introduction to AEM Instances
-
An AEM instance is the environment where Adobe Experience Manager runs. There are two main types of instances:
-
Author Instance
- This is where content authors work their magic. They use the author instance to create, edit, and manage content. Think of it as the “backstage” of your website.
-
Publish Instance
- The publish instance is what your end users see—it’s the live website. Unlike the author instance, this is where content gets displayed, not edited. By default, it usually runs on port 4503.
- Here’s how it works:
- Content gets pushed from the author instance to the publish instance whenever it’s activated (or published/replicated).
- If you want to take something down from the live site, you can “unpublish” it.
-
Fun fact: The publish instance is sometimes called the “publisher.”
-
You can set up multiple publish instances connected to a single author instance for larger websites with high traffic. This helps spread the load and keeps the site running smoothly for users.
-
Finally, having a local AEM setup is a must for developers. It allows you to test and develop in an environment that mimics production so that you can catch issues early.
2. Prerequisites
- Before starting the setup, ensure you have the following installed:
- Java Development Kit (JDK): Version 8 or 11 is required.
- Verify installation:
- java -version
- AEM Quickstart Jar: Download from Adobe’s portal using your organization’s Adobe ID.
- A working directory: Create a dedicated folder for AEM setup, such as C:\AEM\author.
3. Author Instance Steps
- Place the AEM Quickstart Jar file (e.g., aem-quickstart-6.x.x.jar) in your working directory. For example, you can use C:\AEM\author.
-
Rename the AEM jar file as aem-author-p4502.jar
-
You can run the AEM instance in two ways
-
Double-click on the jar file to create a brand new AEM instance. After clicking on AEM Jar will open the below window. It will take a good amount of time around 15 to 20 min to start AEM for the first time. Next time onwards it will take max 5 minutes to start the instance
- Open a terminal or command prompt, navigate to the folder where your jar file is located, and run the following command
-
java -jar aem-author-p4502.jar - p 4502: Sets the port number to 4502 (default for Author instances)
-
-
- you’ll see a screen like this

- Once the AEM instance is up and running, it will open a browser with the below page open. Provide username and password as admin which is OOTB that can also be changed.
- Username: admin
- Password: admin
- The login screen will look like this
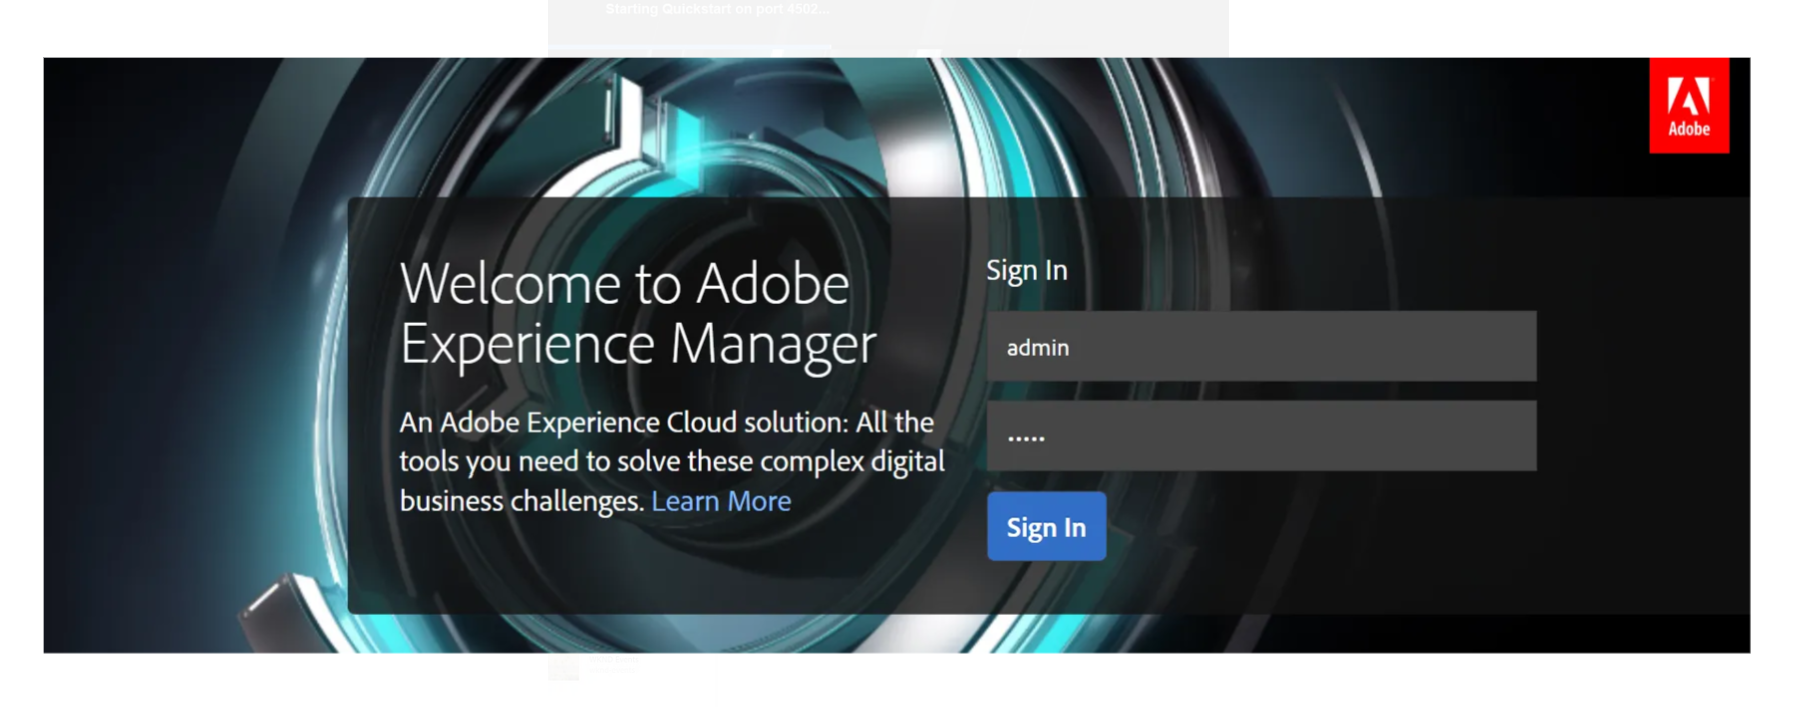
After login, it will open in the below screen format

- To verify the Adobe Experience Manager version, click on the question mark (?) icon. The version details will appear, as shown here:

4. Publish Instance Steps
-
Place your AEM Quickstart Jar file (e.g., aem-quickstart-6.x.x.jar) in your working directory. For example, you can use C:\AEM\publish
-
Rename the AEM Jar File with aem-publish-p4503.jar
-
You can run the AEM instance in two ways
-
Double-click on the jar file to create a brand new AEM instance. After clicking on AEM Jar will open a new window. It will take a good amount of time around 15 to 20 min to start AEM for the first time. Next time onwards it will take max 5 minutes to start the instance
- Open a terminal or command prompt, navigate to the folder where your jar file is located, and run the following command
-
java -jar aem-publish-p4503.jar - p 4503: Sets the port number to 4503 (default for Publish instances)
-
-
- Once AEM successfully starts, it is accessible on http://localhost:4503 using any browser of your choice
5. Directory and Configuration Overview
- The crx-quickstart folder is created when you start an AEM instance for the first time using the AEM Quickstart Jar file.

- Let’s take a closer look at the crx-quickstart folder and what’s inside it. This folder is where most of the core AEM stuff lives after you set up your instance.
-
app
- This folder holds application-level files and libraries that AEM uses. Think of it as the place where additional tools or customizations might live. You probably won’t mess with this too often unless you’re doing something really specific.
-
bin
- Here, you’ll find binary files and executables. AEM uses these for certain backend operations. Again, not something you’ll usually touch unless you’re troubleshooting or upgrading.
-
conf
- This is where the configuration files are. For example, repository.xml lives here, and that’s a big deal if you’re tweaking how AEM works. Developers might poke around here when fine-tuning performance or setting up clusters.
-
launchpad
- This folder is the heart of AEM. It’s where the OSGi framework and all the bundles (those modular components that make AEM tick) are stored. When AEM starts, it grabs everything it needs from here. If something isn’t working, checking the bundles here can give you clues.
-
logs
- All your log files are here, like error.log (super useful for debugging). If something’s not working, the logs are your best friend. Just don’t forget to clean them up now and then—they can get pretty big.
-
opt
- This folder is usually for optional tools or extras. It’s often empty unless you’ve added something specific to your setup.
-
6. What Happens in crx-quickstart:
- As you start using AEM, this folder gets bigger. New content, cache files, and logs all files. It’s a good idea to keep an eye on it, especially in production environments, to avoid performance issues.
7. Differences Between Author and Publish Instances
- Access Control
- The Author instance is an internal, secured environment accessible only to content creators and administrators.
- The Publish instance, on the other hand, is publicly accessible and serves the live content to end users.
- Content Management
- All content creation, editing, and management happen in the Author instance.
- The Publish instance only displays published content—it doesn’t allow any direct editing.
- Workflow and Approval
- The Author instance is often used to workflows for content review and approval before anything goes live on the Publish instance.
8. Why Two Instances?
- Security and Control
- By separating these environments, in-progress or draft content remains hidden from public view. This ensures sensitive or incomplete content is not accidentally exposed.
- Performance Optimization
- The Publish instance is streamlined for delivering content quickly to users, while the Author instance is designed to handle the complexities of content creation and management.
- Stability and Reliability
- Having separate environments ensures that content creation tasks won’t impact the performance or availability of the live site.
9. Common Tasks for Developers
-
Here are a few things you’ll often find yourself doing with the crx-quickstart folder
-
Debugging Issues:
- The logs folder is your go-to place for spotting errors or warnings. Also, check the Launchpad folder to see if any OSGi bundles are inactive or failing. It’s usually a good first step when things aren’t working right.
-
Making Configuration Changes:
- If you need to tweak repository settings or set up clusters, you’ll probably be editing files in the conf folder. Be careful here—small changes can have a big impact.
-
Keeping an Eye on Folder Growth:
- Over time, the crx-quickstart folder can get pretty big, especially in production. Watch out for that! A bloated folder can slow things down, so keep it under control.
-
10. Important URL’s
-
Content Page URL for all content website pages http://localhost:4503/sites.html/content
-
Asset / DAM Page URL for all media files http://localhost:4503/sites.html/content
-
Code Editor URL to access code file http://localhost:4503/crx/de
-
Package Manager URL to access, build, and install code and content packages. http://localhost:4503/crx/packmgr
-
System Console Bundle to access all bundles or jar files. It helps us to check bundle status as install, active, resolved, etc. http://localhost:4503/system/console/bundles
-
System Console Components to check both out-of-the-box and custom components. http://localhost:4503/system/console/components
-
System Console Configurations to check and manage all the out-of-the-box or system-level configurations http://localhost:4503/system/console/configMgr
Every great discussion starts with a simple thought! If you enjoyed this article, found it useful, or have any questions, let’s talk! I’d love to hear from you.
For more updates, tips, and engaging conversations, connect with me on Medium, LinkedIn, and RealCodeWorks. Let’s keep learning together! 🚀✨
Thank you 🙏 !
